AQ40
Guarded by Qiraji servants, the city of Ahn'Qiraj serves as the prison to the Old God C'Thun. During the War of the Shifting Sands, the Night Elves sealed the city with an impenetrable magical barrier, with the help of the Bronze Dragonflight. Only by striking the Scepter of the Shifting Sands upon the gong can a mortal pierce the magical barrier and gain entrance to the ancient city. Recently, in the depths beneath the city, C'Thun began to stir from his ancient slumber, and with his awakening came a dreadful resurgence. Empowered by his dark will, the once-defeated Qiraji rallied their legions, thirsting for vengeance against the Night Elves who vanquished them a millennium ago.


| Required Consumes | Count |
|---|---|
| Greater Nature Protection Potion | 2 |
The Prophet Skeram
The Prophet Skeram is an important religious leader in Ahn'Qiraj, being the author of the Prophecy of C'Thun. The Prophet Skeram is the first boss you'll encounter inside AQ40, and he's only a few trash pulls away from the start.


Plan:
Boss AoE area is arcane damage; greater arcane protection potions.
The boss will start near where it is to be tanked. Move it deeper onto the platform to allow healers & ranged DPS to stay out of the AoE radius.
There will be 3 sets of adds spawned.
100-> 75% Boss HP ; adds will spawn. Tanks split them. DPS Focus adds, Left first , Right second, then return to boss.
75% -> 50% HP ; adds will spawn. Tanks split them. DPS Focus adds, Left first , Right second, then return to boss.
50% -> 25% ; adds will spawn. Tanks split them. DPS Focus Boss.
Bug Trio
Princess Yauj, Vem, and Lord Kri, also known as the Bug Trio, make up the first optional boss encounter in Temple of Ahn'Qiraj. One of the most unique things about this boss encounter is that the raid's decision on the kill order of the bosses will determine what loot drops. The final bug that is killed is the one that drops loot, so choose wisely! The Bug Trio serves as an optional encounter in the Ahn'Qiraj raid.


Princess Yauj
When Yauj dies, she spawns several small bugs (Silithid Swarmers) that the raid must quickly deal with. These adds can be crowd-controlled, but the raid must be prepared to kill them quickly. Additionally, she applies a LARGE heal the other bugs throughout the fight, which makes interrupting her casts important while she is alive.
Vem
Vem's death is the most dangerous, as he buffs any remaining bosses with Vengeance, an effect that significantly increases their attack speed and damage output. For this reason, Vem is almost always killed second or last in the encounter to avoid empowering two bosses at once. If Vem is the last one remaining, he will also enrage.

Lord Kri
Upon death, Kri's corpse leaves behind a highly damaging poison cloud that deals a massive amount of Nature damage to anyone standing inside it. Melee players must immediately move away from his body.

Plan:
Kill order will determine boss drop table. There are shared items and items that drop only when the boss listed is the last one killed.
- The first boss we kill will be tanked in the center of the room.
- One off tank will take their boss north. Healers assigned will follow.
- One off tank will take their boss south. Healers assigned will follow.
When the primary boss is killed the group will travel north and kill the secondary target.
When the secondary is killed bring the last boss back to the center of the room to kill.
Battleguard Sartura
Battleguard Sartura is the second mandatory boss in Ahn'Qiraj, and is accompanied by 3 Sartura's Royal Guards. Both Sartura and her guards are vulnerable to stuns and have similar abilities.


Plan:
The Boss is able to be stunned during the "Blue Whirlwind" (BigWigs BLUE cast bar for whirl wind, not stunnable during RED)
The bosses adds are always able to be stunned. Please keep these locked down until they're all dead.
LiP will save you here, save it for when the creatures are on top of you.
- Kill Order is Square -> Moon -> Star -> Skull.
- When Square dies its tank will move to Skull.
- When Moon dies its tank will move to Skull.
- When Star dies its tank will move to Skull.
- Keep skull apart from the other adds.
- Tanks Taunt Rotation at the end will be
- Skull -> Square -> Moon -> Star -> Skull
Fankriss the Unyielding
Fankriss the Unyielding is the third mandatory boss in AQ40. His melee attacks aren't very strong but he has a stacking debuff Mortal Wound, which reduces incoming healing by 10% per stack. There are 3 bug tunnels in the room, periodically spawning Vekniss Hatchlings every minute that aren't a huge threat.


Plan:
Tanks split up; if main tank calls for relief an off tank can taunt and trade positions.
Tank will take a stacking debuff reduces healing.
Adds will need to be AoE'd down; DPS warriors & druids please LiP(First) and AoE Taunt (Second).
Off tanks focus yellow (purple in graphic) worms; dps focus yellow (purple in graphic) worms.
Off Tanks yellow worms outside of the group, do not travel to meet them. Try to tank close to the group as pictured so melee can assist.
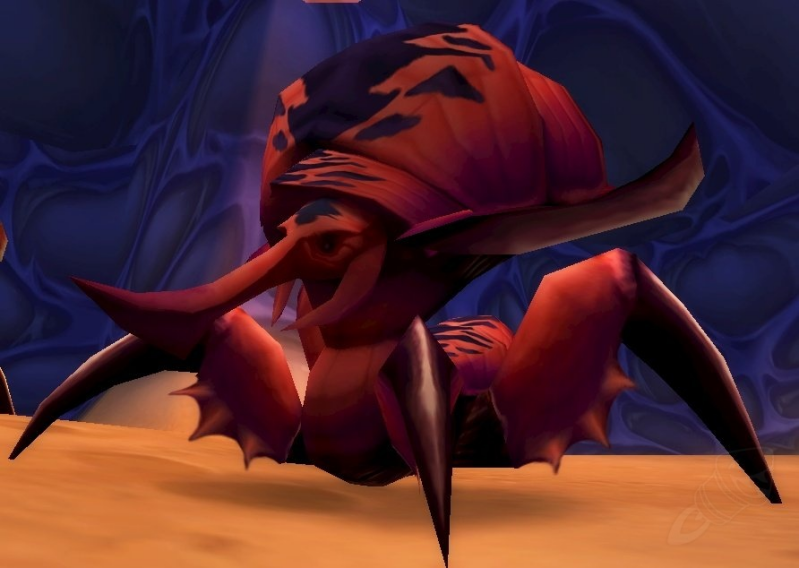
Viscidus
Viscidus is the second optional boss in Ahn'Qiraj and is a pretty unique fight. His Poison Bolt Volley does a lot of damage, so it's recommended to use Greater Nature Protection Potion Greater Nature Protection Potions through the fight. This fight has 2 main phases, Freezing Phase and Shattering Phase.


Plan:
Tank try to move boss back into middle of room to assist with AoE Phase.
250 instances of frost damage (1 frost shock = 1 instance of frost damage)
200 pokes ( 1 physical attack = 1 poke )
Melee make sure you have cold rage dagger with frost oil.
Ranged make sure you have frost attack or frost wand. Get 300 weapon skill for poke.
If boss turns from tank to cast it is likely casting a poison cloud; move away from the direction he faces for the cast.
When boss breaks AoE the slimes. The small slimes are the bosses true HP bar.
Princess Huhuran
Princess Huhuran is the fourth mandatory boss in Ahn'Qiraj and is one of those Nature Resistance gear checks.


Plan:
Main tank can be 215+ Nature res; only remove psn from main tank.
Poison will spread between targets; do not stand near others - spread out.
Boss will begin AoE Stacking debuff casting @ 30% HP.
Barov Peasant Callers or any other minion you can spawn should be used BEFORE this.
Ideal would be to use caller @ 33% HP to ensure they're spawned for the 30% HP mark.
Twin Emperors
Emperor Vek'lor and Emperor Vek'nilash, also known as the Twin Emperors, are the fifth boss encounter in Temple of Ahn'Qiraj. One of the most unique boss encounters in World of Warcraft: Classic, these two bosses share a health pool, swap places throughout the encounter, and this boss requires two Warlock tanks, as Emperor Vek'lor is completely immune to physical damage!


Emperor Vek'lor
Emperor Vek'lor is the magic brother, has a mana bar, and is immune to all physical damage. He can be tanked by a Warlock using Shadow Resistance gear and recommended 8,000+ HP, as his main attack is Shadow Bolt.

Emperor Vek'nilash
Emperor Vek'nilash is the melee brother and is immune to all magic damage. You will need 2 tanks to swap after a Unbalancing Strike. He will also Mutate Bug, empowering one of the many small bugs in the room. Those have to be killed as soon as possible, as they have no aggro table.

Plan:
The graphic (left) is missing the middle tank/healer to pickup large bugs.
If you are on the large bugs please take them to mid if they spawn on the sides.
This is to prevent the teleport giving threat to the wrong person, the bugs should not be near the bosses.
Ouro
Ouro is the third optional boss encounter in Temple of Ahn'Qiraj. Ouro is a large sandworm that transitions from fighting the raid above ground and submerging, dealing damage to the raid from underground. When emerging, Ouro summons Scarabs and deals significant damage to anyone standing over the location he emerges. Ouro serves as an optional encounter in the Ahn'Qiraj raid.


Plan:
Form into 3 Groups
- GREEN : 35+ Yard Ranged dps. (Top threat)
- PURPLE : Tank(s) ( Second Threat )
- RED : Melee/ranged/Heals ( do not over threat. )
Need to get boss to 20% HP before submerge.
Burn damage CD's early and do maximum damage.
C'thun
C'Thun is the final boss the Temple of Ahn'Qiraj. C'Thun is one of the five Old Gods, stripped of his full power by warring Titans. He fell to Azeroth, settling in the arid desert of Silithus, and slowly manipulated the native Silithid race into an army of his own image, the Qiraji. The great fortress city of Ahn'Qiraj was created to house their growing armies and prepare for the coming of C'Thun.


Setup:
For C'thun we are going to split groups fully. Your group in game is your group on graphic.
We will spread groups so that we all BEGIN to enter at zero on the count down.
Once you are thru the door you will fan out and take the most direct path to your assigned location.
Please match the COLOR (8 pizza slices) of your group as the Dark Glare during P1 will have you "shift" your position opposite of where you started.
For example Team 1 (yellow) will end up at team 8 (yellow) position after Dark Glare is finished.
Phase 1:
When Dark Glare begins you MUST kill the adds. Damage the adds.
When Dark Glare begins ideally you will counter spell one eye and turn to kill another if you're gifted with such powers. Earth shock / Counter Spell or similar.
STAY ALIVE DURING P1 - EAT POTIONS DRINK CANDY
When P2 begins we will mimic the graphic on the right. moving groups 3, 1, 2, 4 towards 5, 7, 8, 6, Respectively.

After Phase 1 is complete

Phase 2:
Be prepared to spread out to kill small eyes on spawn.
Where we are standing matters as it determines where the Large Eye tentacle and the Large Claw tentacle will spawn.
If you're consumed during P2 DPS the tentacles inside; Bring the tentacles to low HP but do not kill them until it is requested.
We want these inside tentacles killed once there are no tentacles outside in the boss room.
Make sure to use communication!
This is so that we can FOCUS entirely on dpsing the boss during the weaken.
At the end of this if the boss is not dead Phase 2 begins again.
Create Your Own Website With Webador